PHILWEBSUPPORT.COM

Thursday, January 17, 2008

Twitter, Facebook called on for higher purpose

Google.org's technology project to help save lives in the event of natural disasters or public health threats is set to launch Thursday.

The project, called Innovative Support to Emergencies, Diseases and Disaster (InSTEDD), is a nonprofit organization that ambitiously aims to help communities around the world use Web and communications technology to identify and warn others of outbreaks like Avian flu or disasters like Hurricane Katrina. That technology, which will include social software Twitter and Facebook, will be used to coordinate rescue responses and help save lives, according to Eric Rasmussen, president and CEO of InSTEDD.

"We're not talking about pulling the red phone out of the bottom drawer here," said Rasmussen, a former adviser to U.S. Office of the Secretary of Defense, referring to Twitter and Facebook. "We're talking about using ubiquitous, free software that is repurposed when necessary to fit into a humanitarian need."

Google, through its charitable foundation Google.org, has invested $5 million in the project. InSTEDD has also received $1 million from the Rockefeller Foundation, and another six-figure amount from a foundation associated with venture capitalist and Google investor John Doerr, according to Rasmussen.

Dr. Larry Brilliant

Dr. Larry Brilliant

(Credit: Google)

InSTEDD is the brainchild of Google.org's executive director, epidemiologist Dr. Larry Brilliant, who conceived of it nearly two years ago when he won the TED prize, a grant-making wish foundation that helps raise funds for humanitarian projects.

At the time, Brilliant said: "My dream for InSTEDD (a name that plays off the TED conference) is to fulfill the much-needed role of an independent agent bringing the technological, medical, and organizational skills necessary to help the humanitarian aid community accomplish (early detection of public health threats and disasters), and ultimately help them to make the world a safer place."

With the help of Google.org, the project turned into a nonprofit organization in May 2007. But it officially started in October when Rasmussen came on board and began hiring people and reaching out to the aid community. Now with nine employees, InSTEDD will launch its Web site on Thursday with early versions of open-source software that can be downloaded and tested.

One such application will be the so-called Twitter bot framework, which bridges the Web service and phones with a location-detection feature that can link to a layer in Google Earth, Rasmussen said. That way, for example, Rasmussen could send a message about a patient with untreated symptoms in Laos via SMS on his phone, which might only have one signal bar of service. That message could then be broadcast to anyone subscribed to his messages, including aid workers at UNICEF or InSTEDD's headquarters in Palo Alto, Calif., which could show his location and note on a Google Earth map.

"We can send an SMS message onto Google Earth in an emergency center, and it sees a dot with a color-coded response, with my name and date. Right underneath that, there's a button that says reply, and (aid workers can send a note that says) we have the resources you need 2 miles north...Suddenly there's a two-way conversation using nothing but a cell phone with one bar," he said, adding: "We've done this."

The application will also let people query for friends nearby via SMS, he said.

At its launch Thursday, the InSTEDD Web site will also feature blogs and a directory of aid workers, where professionals can register and regularly update their locations. That way, people can easily locate others in the event of a disaster.

Rasmussen said that the nonprofit is working with nations to develop the software among people who will use it in the field. One such project involves five countries in Southeast Asia. "We will eventually put the software out for release, free and open source," he said.

One other application it's working on is a modification of Facebook that would allow aid workers to see where all their nearby contacts are, as well as reach out to all their "friends of friends" in the humanitarian community in the case of a crisis.

"We've learned that going one layer in social networking is reliable (for finding helpful resources), but two layers isn't," Rasmussen said.

He added: "Social networking in the humanitarian space, that's something you're going to see."

Labels: , , , , , , ,

Thursday, January 10, 2008

Anime DeFormed Eye

Step 1: Open a new 400x400 pixel File

image 1

Step 2: Create a new layer called "Trace". Use Pen tool to draw like the below image

image 2

Step 3: Fill the path with your favorite color. Do the same things above to make like this

image 3

Step 4: Create a new layer called Eye. Use Pen tool again to draw an oval, the eye. Choose any soft brush 2px, stroke the path

image 4

image 5

Step 5: Merge all the layers. Let's jump to the colorisation part (Really hard one). Create a new layer called "Color", choose your color, with the layer mode "Multiply", big soft brush, Flow: 30%. We have to brush many times. Each we choose a darker color. This will make our eye more lively.

image 6

Next to the pupil and its shade

image 7

Step 6: Use Dodge tool, Range Highlight, Exp: 25-30%. Use Pen Tool to make a path around the Pupil

image 8

Stroke this path. Choose Dodge

image 9

Step 7: Use Nudge Tool, 2-5px, Strength 40%, trace along the path above

image 10

After that we have here

image 11

Step 8: Add some more detail to make a realistic one

image 12

image 13

image 14

Step 9: Finish

Anime DeFormed Eye Tutorial: Final Result

Author's URL: ezphotoshop.info

Labels: , , , , ,

Thursday, January 3, 2008

Digital Colouring with Photoshop

The key to producing great digital painting is TIME. Most people who are new to Adobe Photoshop will stop after the first round of applying colour to their illustration. By building up separate layers of colour, the “beginner” art will begin to look more spectacular. The main power of doing your colour work, or any work for that matter, in separate layers is you can control virtually every aspect of the final look. With some experimenting you can get some interesting and sometimes unexpectedly great results.

Digital Colour Tutorial pic 01

For this tutorial I will be colouring one of my monster illustrations. The picture started out as a pencil sketch that I scanned in. You can check out my tutorial (Pencil Sketch to Smooth Digital Shading) on how I got the picture to this stage HERE. Because this picture already has the shading done you can really concentrate on just colouring.

If you would like to follow along with this tutorial using my original full sized picture then CLICK HERE to download the image (480KB). Be patient as it opens in another window. Once it is open, right-click on the image and select "Save Image As..." to save it to your computer.

There are one hundred and one different ways to colour art in Photoshop, what follows is the way I do it. If you are interested in becoming a digital artist this tutorial will give you an insight into my technique.

I suggest you read through the entire tutorial before you begin. Let's get started...


Step 1. The Layer Set Up For My Digital Art

Open your image in Photoshop and duplicate the layer. I named this new layer "Shaded". You can now delete the original locked layer.

Change the mode for this layer to MULTIPLY.

Create a new layer beneath the "Shaded" layer. I named this layer "Solid".
Using a hard brush block out the shape of the creature on this layer. I change the size of the brush depending on detail. Make sure you zoom in when on the edges of creature. (You could use the pen tool instead if you were so inclined and then fill the path). You can see that I used grey but the colour doesn't matter...this layer will soon have it's visibilty turned off.

Digital Colour Tutorial pic 02

Now we have a clear outline of the creature.

Next I create another new layer. Using the gradient tool I fill this layer to get a basic colour (and light) scheme going. This also gets rid of the overall white of the image. The darker colour is 4E4741 at the top and the lighter shade is BBAB94, in case you are following along at home.

Digital Colour Tutorial pic 03

This is the fast and easy set up done!
This time spent organising now is going to save you a lot of time in the next stage (which is the fun stage) Step 2. Adding the Colour > >

Step 2. Adding Colour

Before you pick up the brush and start painting go to your layer palette and click on the "Solid" layer. Although this layer is now hidden on canvas, it's purpose is to keep the colour work within the boundry. With the "Solid" layer active...
Select >> Load Selection... click OK

Now the selection is going to keep your paint on the creature and stop you from accidently painting the background. If you inadvertently lose the selection you can load the selection again.

Create a new layer to start colouring on. I named this layer "Flesh_Colour". The colour that you paint on this layer will be the basic skin colour that you image the creature to be. This of course can be any colour you wish to have for your own artwork.

My preferred brush is a soft airbrush (I use this for the majority of my work but again it depends on the image and style you're going for). Use a large airbrush with the flow lowered to around 15%. You've probably heard it before...Less pressure equals more control".

Digital Colour Tutorial pic 04

The next step is to create a new layer and add your next colour. ALWAYS create a new layer for a new colour. My layer is called "Glaze". See image below. The creature has more life already.

I used a very pale green for my secondary colour and you can see I built up the opacity of the colour in areas.

Digital Colour Tutorial pic 05

This secondary colour I created breaks up the main skin colour to give variety. You can go crazy at this stage and create a whole heap, but for this tutorial I will keep it at two.

Step 3. Adding Highlights

The next new layer is the basic highlight layer for the skin. I’ve kept it pretty dull as I didn’t want to make the skin really shiny or wet looking. Areas like the tongue and eye which are wet have more highlights.

Digital Colour Tutorial pic 06

Zoom in to areas that you want to make "pop out" gradually build up the highlight area.

I'm using white to create the highlights today. If I wanted to add more realism I would add a bit of colour to it. A lot of people will say white is a BIG no-no! The reason why you can get away with it however is because you are creating very low opacity highlights so some colour of the original layers comes through.

Digital Colour Tutorial pic 07

If you look at the more close up image above you can see that highlight lies on the right side of the bumps and lumps of the creature consistently.

If you feel your highlights are too sharp...use Blur >> Gaussian Blur. If you have finished your highlights you can try lowering the opacity of the highlight layer or duplicating the highlight layer to see what it would look like more intense. Experimentation is the key sometimes.

When you are happy with the highlights you are ready for the next stage. Step 4. Adding the Wow Factor >>

Step 4. Adding the Wow Factor

In essence this is the Sarah Lee Pastry technique. We create "layer upon layer upon layer".

An easy way to make the image richer and give it a bit more depth is to duplicate the original shaded layer and to colourize it. This can serve a double purpose and give the skin a translucent look also. The image below left is what we have and the image below right is the result of our second colourized "Shaded" layer.

Digital Colour Tutorial pic 08

First obviously, duplicate the "shaded" layer. I named this new layer "Transluence_Red".
Image >> Adjustments >> Hue/Saturation
THE IMPORTANT THING TO DO, SEEN AS THIS LAYER IS BLACK AND WHITE, IS TO CHECK THE COLOURIZE BOX. Otherwise your adjustments won't work.

Digital Colour Tutorial pic 09

I use both hue and saturation and sometimes the lightness too. The colour balance is another that can be helpful to do minor tweaks, it's actually really good to get into the habit of using that. I use it quite a bit at work for colour correcting.

Digital Colour Tutorial pic 10

Next (the image above left) I gave the tongue a bit more colour. I just duplicated the transulent red layer and erased all but that area. See the image of my layer palette below.

I then created a layer to add a few more highlights for the eye and tongue to give it more of a wet look and to help bring them out a bit more.

Digital Colour Tutorial pic 11

In the image below you can see there are more cooler tones. I did this by duplicating the translucent red layer again I erased sections and changed the colour to something a little cooler. This purple/blue gives the impression of a fill light and helps to give a bit more depth.

Digital Colour Tutorial pic 12

On the final page of this tutorial we will add a background and experiment with altering the colour of the existing layers.

Step 5. Background and Colour Experimentation

In the image below you can see the background I created. It consists of a basic stone texture with a hotspot added to force the main subject to the front.

Digital Colour Tutorial pic 13

To create the stone texture background...

Duplicate the gradient layer. Then go into the channels tab.
Create a new alpha (you can name this stone or whatever) and apply a difference cloud filter
Filter >> Render >> Difference Cloud
ctrl f will keep applying the filter until you get something you like.
You can apply a noise filter if you like, not too much though because it can get too grainy looking.
Now back in your layer palette click on the duplicated gradient layer (make it active).
Add the light Filter >> Render >> Lighting Effects
On the left you can see the image and it has an ellipse around it. You can grab the points on the ellipse and move it around the image. One point projects a light source, the tighter the circle the brighter it will become. Try and get the ellipse to surround the whole image without burning it out. BEFORE YOU CLICK OK...
At the bottom of the Lighting Effects Menu there is a dropdown that is Texture Channel. Make sure you select "Alpha 1" (or whatever you named the new alpha you created). You will see the image on the left change to a stoney look.
Then all you have to do is adjust the mountainous slider to your liking.

Easy huh? You can play around with the settings but I just used the defaults. Once this is done I used the dodge and burn tool to brighten and darken areas but it's not really necessary.

Digital Colour Tutorial pic 14

If you look closely at the layer palettes below you can see that I have altered the hue/saturation/brightness of various layers to achieve the different results. By keeping your colour work on seperate layers you can virtually alter every aspect of the final look.

Digital Colour Tutorial pic 15

Digital Colour Tutorial pic 16

So that's it!
I hope you enjoyed this digital colouring tutorial and maybe even learnt something new along the way.

-Troy Packer

Labels: , , , , ,

Wednesday, January 2, 2008

making a pool in 3dmax


Making a Pool
Wednesday 28th Feb 2007
Summary
In this tutorial, you will model, texture and light assets and assemble them to make an outdoor pool shot. You will use Mental Ray for both its lighting and its architectural textures.

Step 1 - Set up your unit scale
Generally, this sort of shot would be utilised for architectural pre-visualisation. That means that things would usually come off plans, and that without a correct world scale, you'll be in for a world of hurt.

Customise --> Units Setup...


I have selected a metric scheme because I also don't believe in creationism.

Step 2 - Modelling the pool
Make a box 8m in length, 3m in width and -1.5m in height. This will ensure that 0 on the Z axis is 'ground'. Set the length segments to 3. Name the object Pool.

Apply a Normal modifier, this will flip all the polys to face inward, since it is extremely unlikely we will ever see the pool from underneath the floor. Then, apply an Edit Mesh modifier.

Note - In this tutorial, all objects will retain their entire modifier stack. This allows for faster modification in the event of 'Client Changes'. On larger scenes, this slows down 3D Max, but the trade-off is not having to revert to previous versions of the scene to change things.

Edit the vertices until your pool is shaped something similar to this.

Step 3 - Modelling the kiddie pool
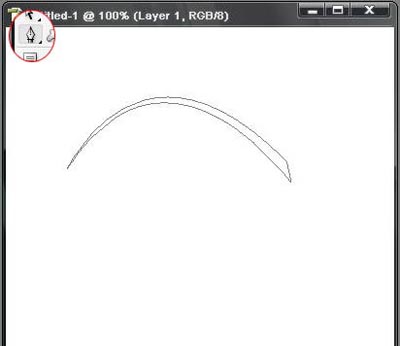
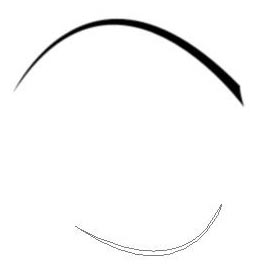
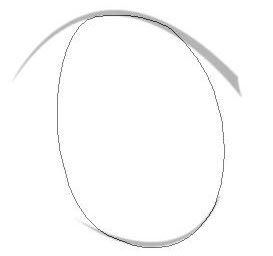
I've decided to model this using a spline for no other reason than demonstration. Turn on 3D Snap (default hotkey is 'S'), and draw a shape similar to the one shown.

Apply an Extrude modifier and make the extrusion 3m (the width of the pool). You'll need to move the the object so it sits in the pool correctly. It is also quite likely that the polygons will be facing the incorrect way, so apply a Normal modifier if this is the case.

It should look something like the above image.

Step 03 - Modelling the ground and surrounding paraphernalia
We're going to make a fairly rudimentary ground, but it will have topology that is going to be texture dependant. We'll be making panel sections of this texture Wood Texture 07.

Make a flat plane, 2m x 2m in size.

Bring up the Material Editor (default hotkey, "m").

Warning - This will show you how to circumvent watermarks on my textures. You cheap bastard.

Crop the image as shown, the exact settings are also shown if you wish to cheat.

Drag/Drop the material onto the plane. Ensure that 'Show texture in view port' (the White/Blue checker box underneath the previews) is on. Exit material editor. Select the plane. Show wireframe/shaded (hotkey is F4). Bring up the modifier panel.

Now you're going to change the segments to match the wood. To save you counting, there are 11 segments. So Length 1, Width 11.

Apply an Edit Mesh modifier, then a UVW Map modifier. What you're about to do is chamfer all those edges, bevel up the wood segments slightly and then remap the entire object on the Z axis in a planar manner.

You can in theory do this entirely with bump mapping, but sometimes bump mapping just isn't going to cut it.

Select "Edit Mesh", click the "Show End Results" toggle (next to the pin). Select Edge select mode and select only the lengthways edges (ignore the ones on the outer edge). Now drag the chamfer distance out to be 0.02m.

Move into select vertices mode and line them up with the texture as shown... Change to Poly mode and select just the plank polys. Extrude by 0.015 and Bevel by -.005. Select none. Select the top of the stack.

You should have something that looks essentially like this.

Now select that object and offset it as an intersecting shape so it looks something similar to this. The reason I've done this is purely so I don't have to go into showing Photoshop or texture modification. Yes, I'm a cheap bastard. I get it.


So you've made a simple texture look pretty similar to this. Select both of the intersecting planes, group them and call them something obvious. I've chosen NCC-1701-E, because I'm sure any artist who gets this scene after me will pull their hair out with anger.

Step 4 - Cloning the decking
Clone the decking around the pool in an orderly and measured fashion. Within a few minutes, you'll realise I've done something very stupid. Due to the nature of working without plans, I haven't put a great deal of thought into this tutorial, and you've been subjected to a nasty piece of maths.

When you put the decking around the pool, you'll notice you won't be able to nicely slot a panel in at the head and tail of the pool... So scale it, nobody will notice. Honest. People are stupid.


You'll notice if you pay close attention, but have no fear, most people won't.

Continue building up the area a little, once you're happy with the size of your pool area, we'll add a surrounding fence, a gutter, etc.

Step 5 - Modelling the surrounding wall.
Once again, I'm keeping this very simple. Model the interior of the wall from the top view, I've chosen to put in a little bit of shape and detail because it will add detail later on.

Now we're going to build quite a few things off this one spline. We'll keep the spline there and then reference it to built the wall and then the glass on top of it.

Clone the spline (as a Reference) and move it 15cm down. We're going to build the outer wall with a slight drop so we can put a recessed garden on the edge of the pool area.

Apply an extrude (make it around 1m high), then apply a Shell modifier and make it around 0.3m on its inner amount. At the very bottom, tick 'Straighten Corners'. You have no built a wall with nothing more than a spline. We'll add slight bevels using the architectural material rather than spending time selecting polys and edges etc.


Now clone the original spline again as a reference. Put it at the same height as the top of your wall object. Add a bevel modifier and push its Start Outline 15cm inward (so its in the exact middle of the wall). Extrude it upwards (about a meter) and add a 2cm thick Shell modifier on top.

So now our pool has a barrier. Next, we'll finish off the garden.

Step 6 - The garden area
I've put a plane in underneath the level of the decking with plenty of polys, mapped it from the Z axis with the UVW Mapping modifier and added some random Noise (Noise modifier) on the Z axis so its got some up/downs about it.

Ordinarily, I would make cut-out-trees and put them in here, unfortunately all the tree textures I have are not royalty free.

Step 7 - Modelling the Lip
The pool needs a lip, a cement barrier around the outside. It will also need some separating stones from the spa/children's area to the deeper end.

In the Spline Creation menu, select rectangle. Drag it around the pool. If you've made a non-rectangular pool, outline your pool. Apply a Bevel modifier to your spline and make it roughly 2cm thick. Untick both the capping options on the top of the modifier.

Apply a Shell modifier and make it 25cm. You should get something like this.

Next, model some basic boxes that would serve as a divider and as a walkway across the middle of the pool.

These don't need to be bevelled, once again, we'll be doing this with the material bevel.

Step 7- Setting up some materials
Generally, when doing architectural pre-vis work, you'll be using a lot of tileable textures, often from packs. This is generally because the building in question doesn't exist, thus there won't be any photos you'll be realistically able to use for texturing.

Open the material editor.

Select an empty slot. Name the material 'Outerwall', and change its type to 'Arch & Design (mi)'. You will need to have Max set to use Mental Ray in the render panel (F10, renderers panel).

Select Matte Finish as your basic preset, and lets go find a concrete texture. Inside your max folder, you'll find maps/archmat. I've chosen "concrete.cast-in-place.exposed aggregate.recessed" for the diffuse texture.

On top of the stack of the wall object, I've also put a UVW Mapping modifier set to Box, with a 2m x 2m x 2m scale.

In the material editor, expand the 'Special Effects' rollout of the material. Turn on Round Corners, and set it to 0.025m.

Clone this material and call it 'PoolLip', change the diffuse texture to a different concrete so its visually distinctive from the back wall.

Apply it to the pool lip, also with a UVW Mapping modifier set to box, but this time, set it to 1m x 1m x 1m (depending on your choice of texture).

Apply the same texture to the pool walkway over the pool.

Step 8 - Texturing the pool
Makke a new architectural material. I'm using finishes.flooring.tile.square.terra cotta.bump for the bump at 100%, and I'm also using it with modified Output curves so its tinted blue.

For the pool itself, I'm using a 20cm cubed box map.

I'm using the same texture but in its original white for the kiddie-section of the pool. Just to add a bit of variety.

For the outer glass, I have used the default architectural material preset for Solid Glass. It will start to work properly once we've put in a background.

Step 7 - Making the water
Drag a plane out for your water and apply the standard Architectural Material water preset. In the material, change its Transparency to 0.8. You can tweak and play with this water later to fine tune it to your personal tastes.

Step 8 - Make a camera
Lets put a camera somewhere flattering.

Here's an example camera.

Step 9 - Adding something to cast interesting shadows
Visually, this is going to be quite dull without some dynamic range. So lets build a cover for this pool out of basic blocks.


This is just some basic boxes put together to make a roof of some sort, with a very simple wood texture applied (Find it here). The image has also been cropped.

Now we begin the lighting.

Step 10 - Add a sphere around the scene
I've chosen a photo to use as ambient light source. You can of course use a HDRI map, but I've chosen to use the following texture.


Download Full Res

Apply it with substantial blur, and set its opacity to about 50%, and make its background colour black. Change the mix amount from black to full colour to change the amount of ambient light bouncing around your scene.

Flip the polygons on the sphere with Normal modifier.

Select the object properties and make the object invisible to camera, not to receive or cast shadows.

Next, place a MR Area Spot light outside the sphere and aim to toward the pool, angle it so some of those newly modelled structures cast some interesting shadows across the area.

Tint the light to a slight tinge of yellow.

Put a large plane in the background, and apply a background image to it. Use the same one as the background image.

Step 11- Turning on final gather
So, You've built a background plane, a sphere for some ambient bounce and you've put in your main spotlight. Bring up your render panel and go to indirect illumination. Turn your final gather onto draft and do a test render, you should get something 'similar' to this.

For reference, I've set the bounces to 1.


Step 12 - Adding more!
Realism is basically going to span from complexity, this can be achieved by adding furniture, using better textures, etc and so forth.

Step 13 - The final composite
Once you've done your final quality render, you might want to render an ambient occlusion pass to use as a multiplier in post. This will give a bit more reality to your shadows.

Make a new material, name it AmbientOcl. Set Self Illumination to 100, and apply an Ambient Occlusion shader to the diffuse pass. This pass doesn't need to be spectacular quality, so 64 samples and a fall off range of 2 meters will be more than enough

Open up the render panel, goto the Processing panel, and drag the ambient occlusion texture into the Material Override tab. When you go to render, ensure you have turned of Final Gather.
More pics.

Step 14 - Photoshop
Everything in the real world goes through some post, be it Photoshop, Shake, Nuke, Combustion, Flame, Inferno or even Gnome. Use your ambient occlusion layer as a multiplier layer at around 50%. Add some glows. Tweak. Have fun.

Final (with some chairs added and the ambient occlusion pass included).


courtesy of tutorial outpost

Labels: , , , , ,


philwebsupport


My Topsites List
Open Web Design
Back to top


Designed & Developed by
chris paragas