 DeviantART
 flickr
 linkedin
 picasaweb
Step 1
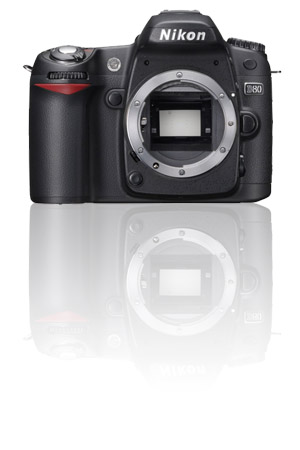
Open our picture (it is located here). Picture size is 500px x 375px.
Step 2
We have to remove white background from our picture. First copy background layer (use CTRL + J on the keyboard) and name it back_copy. Insert new layer and put it below our "back_copy" and name it "white". You can now delete our "background layer". Now use Magic Wand tool (W) set tolerance to 20 and click somewhere on white area on "back_copy" layer. Press DEL on keyboard. Next go to the IMAGE - CANVAS SIZE and set new values for dimension of 500px x 750px.
Now we have to copy "back_copy" layer so we again use CTRL + J on the keyboard. Name that layer "illusion". Go to the EDIT - TRANSFORM - FLIP VERTICAL. This will flip "illusion" layer. Pick Move tool (M) and move picture exactly below our object. Also put "illusion" layer below "back_copy" layer in the layer palette.
Step 4
Now we have to make illusion of dissapearence. Click on the "back_copy" layer, go to the Layer palette and click on Add layer mask.
Click on the mask, pick Gradient tool, select Black,White and drag gradient tool from the top of our picture down to the 4/5 of picture (maybe just a little more). Set opacity of layer to 70%.}
Labels: Ecommerce Web Design, Flash Web Design, tutorial, Web Design, web site design


0 Comments :
Post a Comment
Subscribe to Post Comments [Atom]